Setting QuantLib up in my laptop, again. An amazing tool for quants.

Aug 10, 2025
Recently I’ve decided to run the maintainance of my laptop, just to remove files I no longer use and that are hidden because I moved somewhere and I don’t remember where. Naturally, every time I have to set it up again. That’s why this post is a reminder of how to setting up the QuantLib library, since I think is one of the most nice libraries in scope of quantitative finance. This library covers different instruments, pricing engines and more, developed by following an architecture that has evolved over time, as pointed out in Luigi Ballabio’s book. I strongly encorage the readers to read the book, where Luigi walk you throug design patterns and reasoning for implementing them. In my opinion this approach, although far from being perfect, is a really good approximation to the Occam’s Razor, where parsimony is our allie. Different concepts are discussed in there. Concepts that I’d like to dive deep into later on in another post. At the moment, let’s see how to use the library if you love, as I do, dive into details of quantitative finance via well designed tools.
QuantLib
QuantLib is a free/open-source library for quantitative finance, as it’s webpage starts saying. It is coded essencially in C++, see QuantLib Github repository. Some non-quants may blank their eyes and say “it’s hard to learn”. But here is where things get better, because the library is also exposed to Python via Swig, see QuantLib-Swig repository. Amazing, right?.
It’s not necessary that you try to understand how programming languages are linked with a very big project as QuantLib. Instead, you could take a look into a very straightforward example I prepared a couple of years ago here.
Frequent posts are published by Luigi here, in case you want to stay tuned with tips and tricks to work with the library. Also new releases are notified, among other channels, there.
QuantLib C++
The core is documented here, besides QuantLib books. People not involved in C++ coding may feel overwhelmed as the library is comprised a many classes, design patterns, pricing engines and financial instruments. Moreover, diversity is what makes QuantLib a nice tool for quants, since with variety of instruments and payoffs we can build synthetic pay-offs.
QuantLib Python
Don’t cry, baby, don’t cry. There is a layer on top C++ codes, that exposes the library to Python programming language. This is done by means Swig, which is “a software development tool that connects programs coded C/C++ with high-level programming languages”. I think the reader starts seeing what is this about.
Why?
With the architectural design, implemented to optimize classes and data resource consumption, all coded in C++ in spite the programming language challenges, allows to build on top thereof. This approach keeps a single point for developing, with top layers enabling users to connect without losing core functionalities. That’s what I infer at least, perhaps we can ask Luigi and library’s contributors to confirm or challenging this assumption.
Installation
I forgot to mention that my OS is one of Linux family, that I prefer since it allows more control on OS setup. Therefore, the instructions described in here are mainly useful for this operating systems. Nonetheless, as this instructions use tools also available in other OSs, such as CMake or Git, readers likely wouldn’t find any problem replicating in their respective OS. Following steps correspond only to QuantLib install, no any other installation is covered, for instance CMake, Git, C++ compiler, Boost lib and others.
Cloning QuantLib repository
Using Git we can open a terminal to clone the repository. My preference is creating a folder fully dedicated to Git specific projects, reason why commands listed here run within such a folder. Readers can choose based on their own preferences.
⚠️ Warning :: Recall that if you want to work with the library by modifying it for your own project, it’s better to fork the repository and then cloning your forked repository in your laptop, instead of cloning QuantLib repository directly.
> git clone https://github.com/lballabio/QuantLib.git
Once this command is executed, all the codes in QuantLib github repository will be copied into your laptop. The project contains a lot of files, including not only C++ files -source code and headers-, but also configuration files such as CMaLists.txt or QuantLib.vcxproj. The former is the one I’ll use here, but reader if working in Windows, with access to Visual Studio may run the later.
Folder directories
As you may be eager for running the library for then playing with it, I’m going to take only few sentences to point out relevant folders.
Core folder
The core of the library is within a folder called /ql that is comprised by subfolders in charge of many different thigs such as:
- Design pattern classes
/patterns(LazyObject,ObservableorSingleton, for instance) - Financial instruments supported
/instruments - Term structure classes
/termstructures - Cashflows modelling
/cashflows - Stochastic processes
/processes - Pricing engines
/pricingengines - Others
Examples folder
The /Examples folder contains different examples for pricing diverse type of instruments in C++. You’ll see that each example contains its own .vcxproj file, that can be individually executed in Visual Studio. Moreover, CMakeLists.txt file is also allocated within each subfolder of examples, and it allows to run the examples once the library has been installed (Installation step described later on here).
Documentation
Similar documentation as observed in Official website can be reproduced and extended with files in folder named \Docs. This folder contains a make file named MakeFile.am that is responsible for documentation generation by executing the command below, preferibly in your own \build folder, that I’ll refer to later as well.
make docs
By running the documentation it will generates a set of *.html files that can be easily navigated by any library user.
Docker approach
In case you want to bear a container approach for your projects or your systems, it is also allowed to do so using the docker file named ci.Dockerfile, quite usefull for continuous integration or CI. This file is allocated in \dockerfiles folder.
Installing QuantLib
Once you are familiarized with main folders, I can proceed with how I do install the library. Before, I want to highlight two points.
- This approach will create a compiled library which means will compile QuantLib code generating a
libQuantLib.sofile (this is the shared library yielded in Linux OS), together with the respective headers that can be used by including them in any other project’s compilation using QuantLib (or your experimental version). - It is true that you don’t need to compile QuantLib code if you use package managers such as Conan or VCPKG. Nonetheless, I hope you’re also into in Quantitative Finance as I do, just to have time to play and experiment with extra models/methods. If the last is also your case, you’ll need to compile the library with your changes and install it, as I’ll show below.
CMake approach
Due to I do work in Linux, my personal preference is to use CMake for compiling C++ projects, given the portability and easy use for compiling structured C++ projects. As such, I’ll refer to the CMakeLists.txt in the root folder where you cloned QuantLib repository. This file contains all the instructions for compiling QuantLib codes. I guess you agree on that describing the content is out of scope this instructions, so I’ll skip its content description. Just keep in mind that this file is core for compilation and installation under this approach.
Compilation Setup
Then what we have to do is to create a folder that is used as a temporal folder allocating any temporary file required for compiling and then installating. This folder is commonly named as \build, and it is located at the same level of \ql folder. Then we’ll get into this folder in the terminal to start the process, as follows.
> mkdir build
> cd build
> cmake .. -DCMAKE_BUILD_TYPE=Release -DBUILD_SHARED_LIBS=ON -DCMAKE_INSTALL_PREFIX=$HOME/quantlib-install
As you noticed, CMake requires have already been installed, since third line uses CMake’s command line interface to do prepare files for compilation. Additionally, I’m using three CMake flags DCMAKE_BUILD_TYPE, DBUILD_SHARED_LIBS, and DCMAKE_INSTALL_PREFIX. I’ll skip the first two, as the reader may refer the official documentation in the link. Nevertheless, I want to emphasize in the third one. DCMAKE_INSTALL_PREFIX parameter is in charge of configuring the folder where the library will be installed, then it can be modified as user wishes, but keeping into account that you have to remember this path since it will be called by other projects when refering to QuantLib classes.
Furthermore, if you paid attention, there is a .. in the command. This means CMake will look for the CMakeLists.txt in parent folder respect to the folder in the terminal. As I’m executing this command within \build folder, it means CMake will look for the CMakeLists.txt in the root QuantLib folder where I cloned the repository using Git.
Compilation
Once executed, the folder \build will contains the setup files needed to compile the solution. So far, this files are not QuantLib’s compiled files. Then to proceed with compiling the files to then generating our shared library and respective headers, we need to run the command below.
> make
☕🍵 Tip :: Now, please go and grab a cup of coffee or tea, because it will take a while. You’ll see how the progess is indicated in the terminal going through QuantLib targets, setup in CMake files, as shown below.
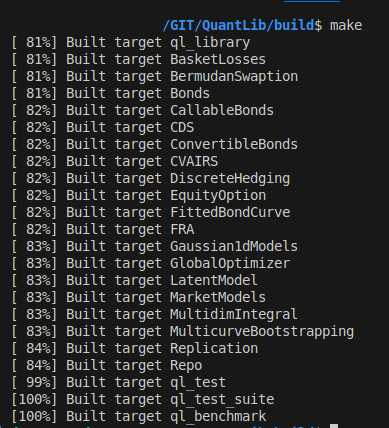
Easy peasy lemon squeezy!!. So far, at least, we can rely on CMake configuration that QuantLib contributors have built for us, such that we don’t need to do any extra to compile the codes. As a result, we’ll be able to see extra folders within \build folder, such as \ql (again?), \Testing, \Examples, and more. But lets pay attention to a relevant thing, for understanding what’s going on.
If you take a look in \build\ql folder, you’ll see that sub-folders structure is pretty similar to the one observed in \ql folder. Why?. Well, that’s the C++ and CMake magic. When compiled the codes, CMake has copied the headers (.h/.hpp files) of the library, as they will be installed together with \build\ql\libQuantLib.so. We could consider \build folder content as a pre-stage to install.
⚠️ Warning :: Recall that when creating the shared library, the headers are not within the shared/static library. Then, any other program that needs to communicate with the library requires to
#includethe library’s headers.
Installing
Now the last step to finally install the library is running the command below. Recall executing it being in the terminal within \build folder.
> make install
⚠️ Warning :: This is crucial, because here is where
DCMAKE_INSTALL_PREFIXparameter acts. During installation, the headers and shared library will be installed in linux within the directory you have setup in this parameter. Then, as the value started with $HOME, will means the user home directory will be used to install the library. If you don’t know which directory is that, just run in the terminal the commandecho $HOME, that shows the respective folder.
You can check the installation of the library just by running the following commands.
> cd $HOME/quantlib-install
> ls
First command will redirect to the folder where QuantLib has been installed, and second one will list the content of that folder. As result, you should be able to see three folders.
| Folder | Description |
|---|---|
\bin |
Contains additional executables, not needed at the moment for us. |
\include |
✅ This folder internally contains a subfolder named \ql, that stores all the headers required by any other C++ project to interact with QuantLib library just installed. |
lib |
✅ Contains all elements associated with the shared library named libQuantLib.so |
This folders will be used to test our installation.
Testing QuantLib install
For testing the install of QuantLib library in our laptop we can replicate the code below. Any doubt you can refer to QuantLib documentation and also \Example folder. In this ocassion I want to price a fixed-rate bond, but you can try with any other instrument modelled.
Having followed the steps above, we can now move to any other folder, as you wish, to create new code for testing the appropriate installation of the library.. Then proceed following forthcoming steps in this new folder apart from any other folder related to QuantLib library.
CMake configuration
As I mentioned before, CMake is a tool that facilitates many tasks, when referred to C++ code compilation. For that reason I prefer to explain this example using it, also because let us to identify the blocks required for any C++ code that makes use of QuantLib (When not having Visual Studio).
Then, in this new location, we can create a file named CMakeLists.txt. The content of this file is detailed below.
cmake_minimum_required(VERSION 3.10)
project(TestingQuantLib)

set(CMAKE_CXX_STANDARD 17)
set(CMAKE_CXX_STANDARD_REQUIRED ON)

add_executable(main main.cpp)

set(QUANTLIB_INCLUDE_DIR "$ENV{HOME}/quantlib-install/include")
set(QUANTLIB_LIB_DIR "$ENV{HOME}/quantlib-install/lib")

target_include_directories(main PRIVATE ${QUANTLIB_INCLUDE_DIR})
target_link_libraries(main PRIVATE ${QUANTLIB_LIB_DIR}/libQuantLib.so)
Four lines play a relevant role for compilation using QuantLib. That I’ll describe below.
Setting the target
At least in the initial design, we’ll create an executable file based on codes within a file named main.cpp, that I’ll describe in next section. But at the moment we are calling this executable as main, and can be identified in the line below.
add_executable(main main.cpp)
Setting variables in CMake context
The following lines create two variables in CMake context. They are QUANTLIB_INCLUDE_DIR and QUANTLIB_LIB_DIR. The relevante is its connection with the folders where we have installed QuantLib. You will notice the reason why I have described the result of installing the library in foregoing steps. The reason is that the two variables are going to point out to the folders containing QuantLib’s headers and shared library, respectively.
set(QUANTLIB_INCLUDE_DIR "$ENV{HOME}/quantlib-install/include")
set(QUANTLIB_LIB_DIR "$ENV{HOME}/quantlib-install/lib")
Linkin CMake variables to executable
As the executable needs to know where to look for any external source of code during preprocessing, compiling and/or linking process, the CMake variables are associated to the executable object in CMake file. Where CMake function target_include_directories is used to attach the folder containing headers (that’s why the include folder), whereas target_link_libraries function links the library by means its shared library object (libQuantLib.so).
Now, let’s jumpt to the real code.
C++ testing file
All this code you can store in a file named main.cpp, at same level of CMake file. People with experience in C++ may recognize the preprocessor directive #include, that enables the code to make use of structures coded in other C++ files. In this case I’m using the headers from quantlib as follows.
#include <iostream>
#include <ql/instruments/bond.hpp>
#include <ql/instruments/bonds/fixedratebond.hpp>
#include <ql/time/calendar.hpp>
#include <ql/time/calendars/target.hpp>
#include <ql/settings.hpp>
#include <ql/cashflows/coupon.hpp>
#include <ql/time/schedule.hpp>
#include <ql/cashflows/fixedratecoupon.hpp>
#include <ql/time/daycounters/actualactual.hpp>
#include <ql/termstructures/yieldtermstructure.hpp>
#include <ql/termstructures/yield/flatforward.hpp>
#include <ql/pricingengines/bond/discountingbondengine.hpp>
#include <memory>
The next lines may be exposed to debate, since some people likes, or argue against, namespaces. They are a mechanism to add “surnames” to the structures in C++. Some people attempt to avoid them for the sake of clarity, but this time since the code is quite small, I’ll skip explicit reference by using namespaces.
using namespace std;
using namespace QuantLib;
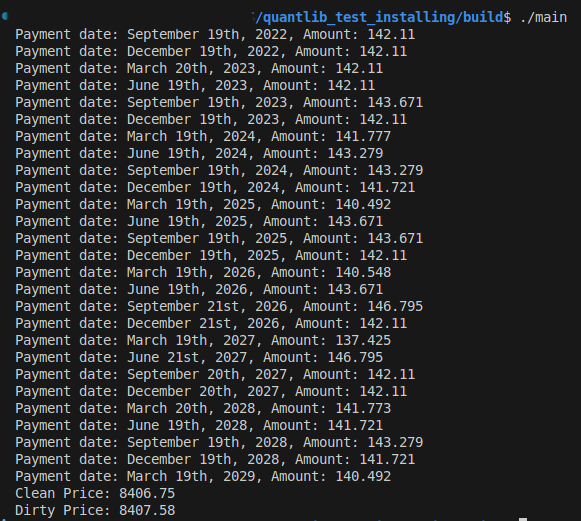
Then a main function (Recall this is a straightforward test, and no formal), is created such that I can price a Bond -invented-, that was issued at 19th June 2022, with maturity date 19th March 2029. It pays a quarterly coupon calculated at ACT/365 day counting method. The coupon is 5.7% of notional. Bond’s notional is $10.000. The only exotic parameter here is the Forward flat rate of 5% used to create the discounting curve for getting the NPV of bond’s cashflows. The result is the dirty and clean price.
int main(){
    Date todaysDate(10, August, 2025);
    Date issueDate(19, June, 2022);
    Date maturityDate(19, March, 2029);
    Calendar calendar = TARGET();
    Real notional = 10000.0;

    todaysDate = calendar.adjust(todaysDate);

    Frequency frequency = Quarterly;
    Rate couponRate = 0.057;
    DayCounter dayCounter = ActualActual(ActualActual::Actual365);

    /*
    ----------------------------------------------------------------------
    BOND Coupon's calculation
    ----------------------------------------------------------------------
    */
    Schedule schedule(issueDate, maturityDate, Period(frequency),
                    TARGET(), Following, Following,
                    DateGeneration::Backward, false);

    // Build Leg using FixedRateLeg
    Leg coupons = FixedRateLeg(schedule)
                    .withNotionals(notional)
                    .withCouponRates(couponRate, dayCounter);

    // Print coupon payment dates and amounts
    for (const auto& cf : coupons) {
        std::cout << "Payment date: " << cf->date()
                << ", Amount: " << cf->amount() << std::endl;
    }

    /*
    ----------------------------------------------------------------------
    BOND Pricing
    ----------------------------------------------------------------------
    */
    Settings::instance().evaluationDate() = todaysDate;

    // Discounting curve using a Flat Forward rate
    Handle<YieldTermStructure> discountCurve(
        boost::make_shared<FlatForward>(todaysDate, 0.05, ActualActual(ActualActual::Actual365), Compounded)
    );

    // Bond instance creation
    boost::shared_ptr<Bond> bond = boost::make_shared<FixedRateBond>(
        0, // settlement days
        notional,
        schedule,
        std::vector<Rate>{couponRate},
        dayCounter,
        Following,
        notional,
        issueDate
    );

    // Setting Bond Pricer, that allows to us pricing the bond by linking the Discount curve
    bond->setPricingEngine(
        boost::make_shared<DiscountingBondEngine>(discountCurve)
    );

    // Calculation of clean and dirty prices
    Real cleanPrice = bond->cleanPrice();
    Real dirtyPrice = bond->dirtyPrice();

    std::cout << "Clean Price: " << cleanPrice << std::endl;
    std::cout << "Dirty Price: " << dirtyPrice << std::endl;

    return 0;
}
Compiling the test
Resulting structure of files above should be like
quantlib_test_installing/
├── build/
├──── ...
├──── main
├── CMakeLists.txt
└── main.cpp
Consequently, to test out code, in this ocassion we need to follow similar steps as when we compiled QuantLib codes. Those are:
- Creating a
\buildfolder - Executing
cmake ..command, within\buildfolder - Execute
makecommand, within\buildfolder
Now!, you’ll see a new file within \build folder named main. Recall this is the name we setup in CMakeList.txt file, more explicitely when using the function add_executable. You can change the name in that line to whatever you want, and the output once you run make is the file with that name. Then to run the executable just type in the terminal following command.
> ./main
Voila!!. You wil have installed correctly QuantLib, and tested it via a straghtforward example, pricing a bond.
I Want to run with commands!
In case you prefer more command line for compiling code instead of tools such as CMake, the test can be compiled using the command below.
First you need to add QuantLib’s path to environment variable LD_LIBRARY_PATH, such that allows the dynamic linker where to look for files.
> export LD_LIBRARY_PATH=/home/donnetoo/quantlib-install/lib:$LD_LIBRARY_PATH
Then, once the linker knows where to look for the library codes, you may compile main.cpp file to produce an executable named main, as done in CMake scheme, using g++ compiler, as follows.
> g++ -std=c++17 -I$HOME/quantlib-install/include main.cpp -L$HOME/quantlib-install/lib -lQuantLib -o main
Conversely to CMake, here you can run the command even at same level of main.cpp. Just take into account the executable named main will be created at same level, unless you specify either a relative or an absolute path where to create it.
Hope this information is useful for you. Any doubt not hesitate reaching me out via LinkedIn, I’ll be really happy to help.